Why your product image isn’t compelling users to buy
As a small business selling online, the quality of your product images makes the single most significant impact on the buyer’s decision. Does the product look beautiful? Are there visible flaws on your vintage items? Does the item itself have slight design detailing that makes it unique? Your customers do not know what they cannot see. You could write lengthy descriptions, yet that simply will not do your product justice. People buy with their eyes first.
I am guessing you are already taking product photos and have plenty of images on your online store. However, a poorly photographed product detracts from the consumer’s path to purchase.
There is one thing you can do to improve the quality of your product images: setup a great product photo-shoot.
Fortunately creating a simple and professional setup is easy and cheap and we’re here to help you along the way.
1. Lights!
This is the most vital aspect of your photo-shoot. Before any magic can happen with the camera, the lighting has to be ideal. Natural light if used correctly can be beneficial to a photo-shoot.
If you have a bit of budget to work with, purchasing some semi-professional lightening equipment can go a long way. I strongly encourage you to check these lighting options out. There are prices ranging from a designer on a tight budget to all out professional photography kits. Here is a simple example:
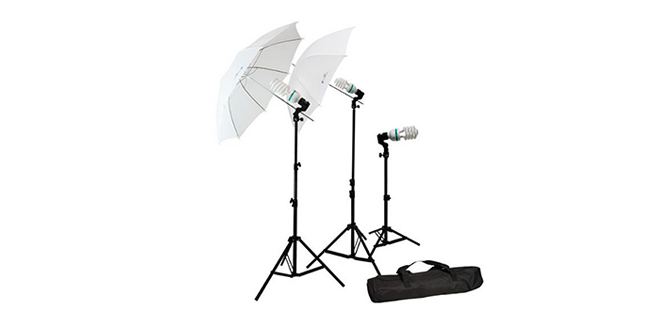
source: amazon.com
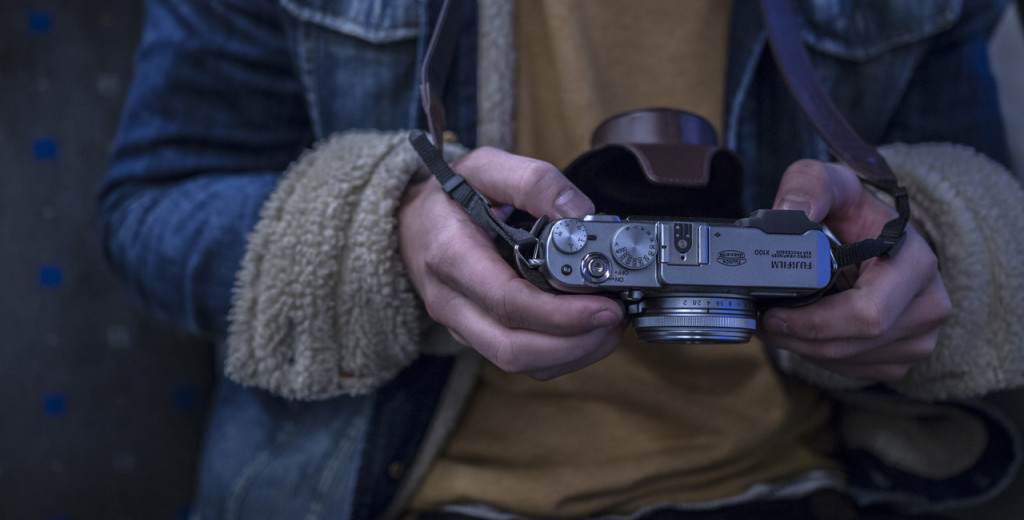
2. Camera!
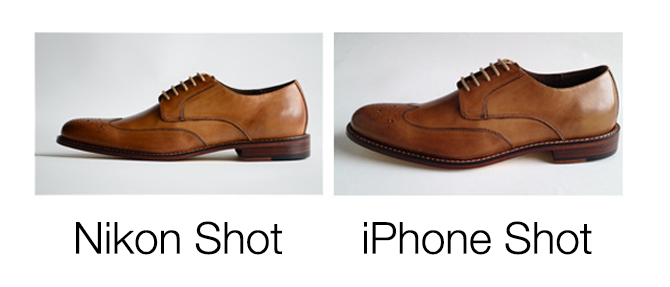
There are an excess of options when it comes to quality cameras in this day and age. Take for instance, the Nikon D3X at a whooping $7999.95 or the D3100 at $349.95 and the many options in between and below. If you are not on the market to buy a camera, the next best option just might be in your pocket. That iPhone or Samsung can do a fairly good job. The differences are not very noticeable to the untrained eye if done correctly.
source: practicalecommerce.com
Camera calibration is also an essential part of focusing in on the fine details of your products. Without overcomplicating things, you want to set your white balance to auto and turn off the flash to avoid glare.
When determining your file size, bigger is better. Set your file size to large or RAW (Note: A RAW file is a large, unprocessed file. If using RAW you need to be utilizing photo editing software to properly access the file) and your quality setting to Superfine (This maximizes the amount of pixels available to your shot).
For the ISO you want to keep it as low as you can. A low ISO reduces the sensitivity of the sensor, 100 is the ideal number. If you have no idea what that means, find your ISO and test other numbers. You’ll see what I mean.
3. Sweep!
This is an essential part of the scenery surrounding your product. You could head to the craft store and purchase a small sweep or sweep stand. With a sweep stand, all you need is a sheet of pure white craft paper and pin it to the top of the sweep stand and bottom of the sweep stand.
If these options are unavailable to you, a DIY sweep is simple and still just as effective one bought whole.
What you’ll need is a sheet of pure white craft paper, a long table and an object a couple feet above the table to clamp your white craft paper onto. The angle of your DIY sweep should be similar to this:
source: www.removethebackground.co.uk
4. Accessorize!
The tripod is a must-have investment for the avid photographer. This is because it allows you to take much longer exposure photos. This brings out every small detail of the product being photographed. Holding the camera in your hand during a long exposure shot will cause unwanted blurriness. A simple tripod can be found on amazon or any other marketplace for a very affordable price. Fancy is not essential.
If your shoot is suffering from light deficiencies, light reflectors are an affordable way to make sure your product has all its details visible. When shadows and dark spots begin to trouble your shot, you have two options. You can add more light, which can get expensive, or more efficiently utilize the light you have available. Reflectors are a great way to make sure your photo-shoot’s lighting bring out the best of your items.
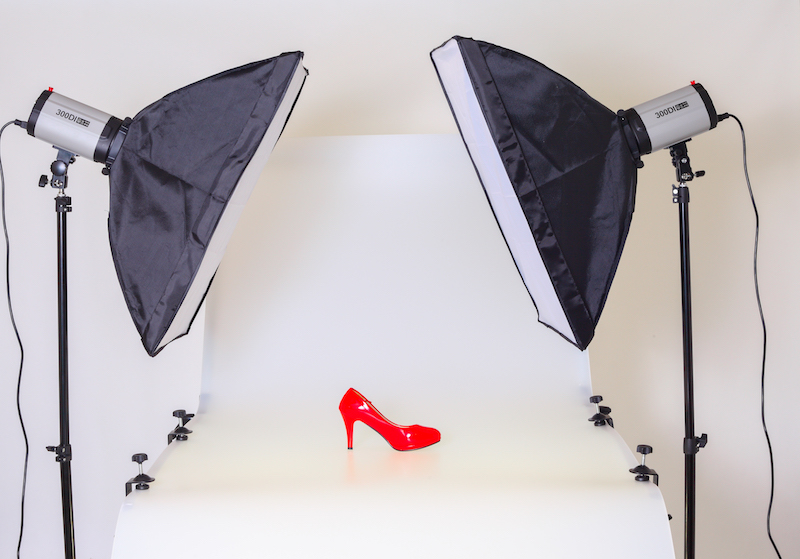
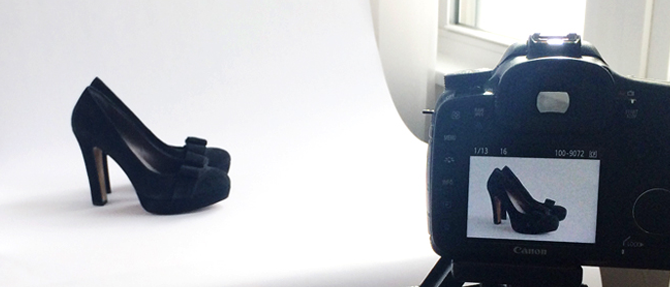
5. And Now…. Action!
Once you have your sweep at the desired angle, you’ve positioned your lights, and calibrated your camera, your setup should look something along these lines:
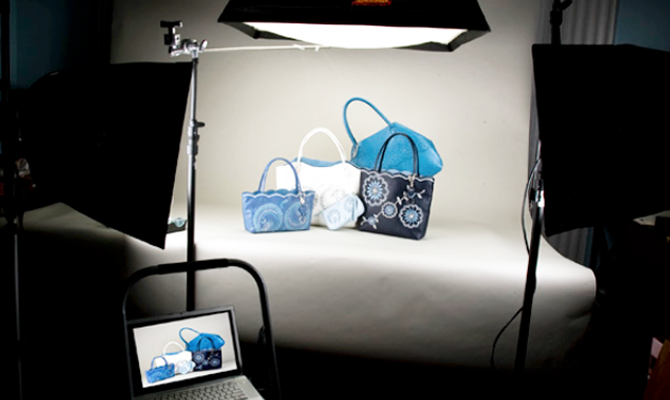
source: rhapsodylabs.com
Now the magic happens…
Place your product in the center of your sweep and begin to take to test shots. These test shots will determine where lighting needs to be adjusted or if the camera needs to be calibrated differently.
After examining the test shots, adjust your reflectors to compensate for a lack of light in the problem areas or areas that require more definition. Keep taking photographs until you have your desired lighting and exposure.
Once you have your photos, I recommend that you do some re-touching with some form of photo editing software such as Photoshop. There’s also free photo editors online, check out: pixlr.com. In the end, re-touching can really make a difference in illuminating the fine details of your product.
Now that you’ve got all the knowledge and the tools, create those beautiful product photos. These photos give your customers that sense of assurance of quality they require when buying products online. Now get started!
Lyle Niblock with Now In Store